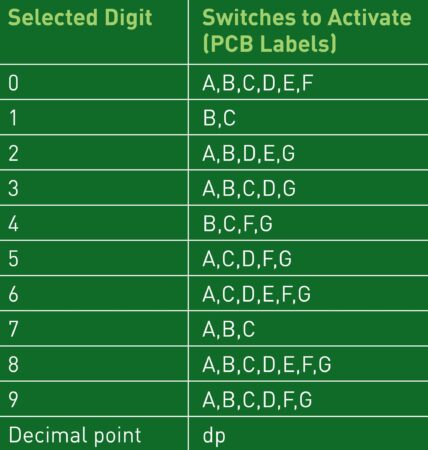
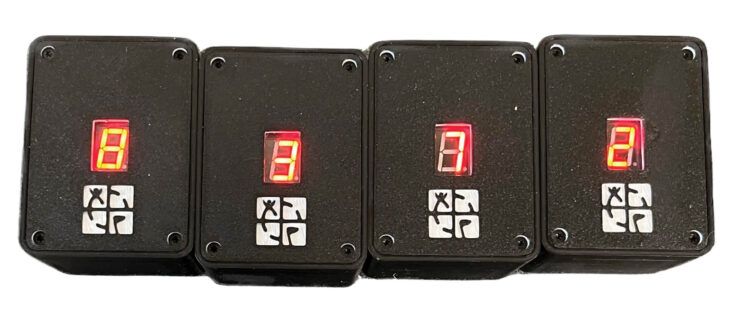
Now you can place the switches and activating magnets in such a way that all the blocks must be placed in order, side by side, to illuminate all the numbers simultaneously. This provides the geocache finder with your numbers in the correct order.
We’ll show you one way to link the blocks, though other switch and magnet positions are possible.
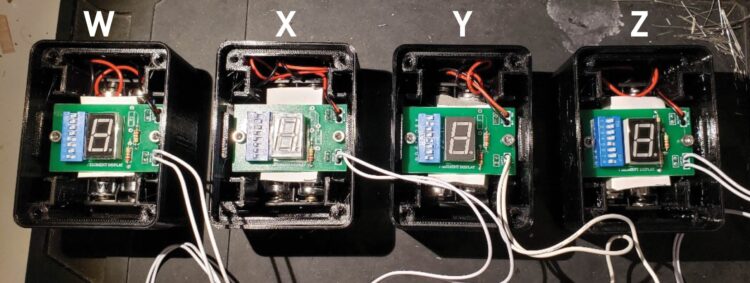
1. Place all four blocks in a row, in the order you want to display the digits. (Check again with the magnet if you’re unsure which is which.) For clarity, we’ll call the blocks W, X, Y, and Z, from left to right. As each block is set up, you’ll move it off to the side, so pay careful attention to the W, X, Y, and Z designations at each step.


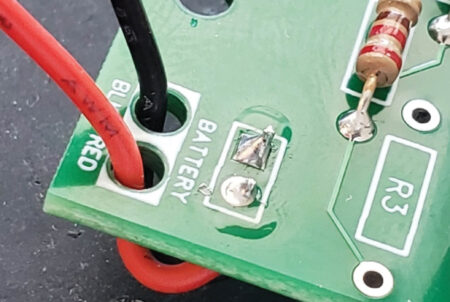
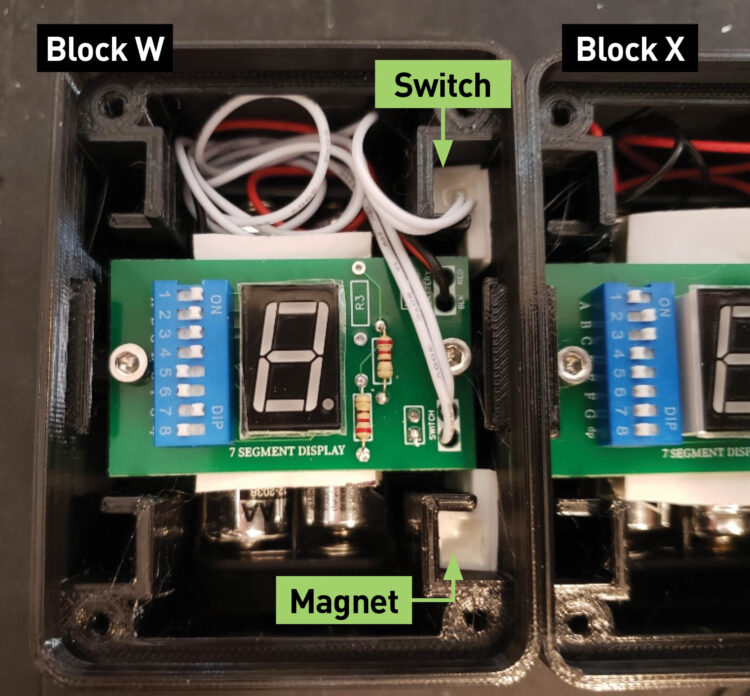
2. Block W — Slide the sensing switch from block W into either of the two positions on the right side of the block. Place a magnet in the remaining position on the right side of block W. Tuck in the switch wires in the top or bottom of the block.


NOTE: Depending which position you’re using, the sensing switches may be placed wire side up, or they may need to placed wire side down, in which case you need to feed in the wire first. Don’t force them down in the slot, but do insert the magnets and switches as low in the block as possible.
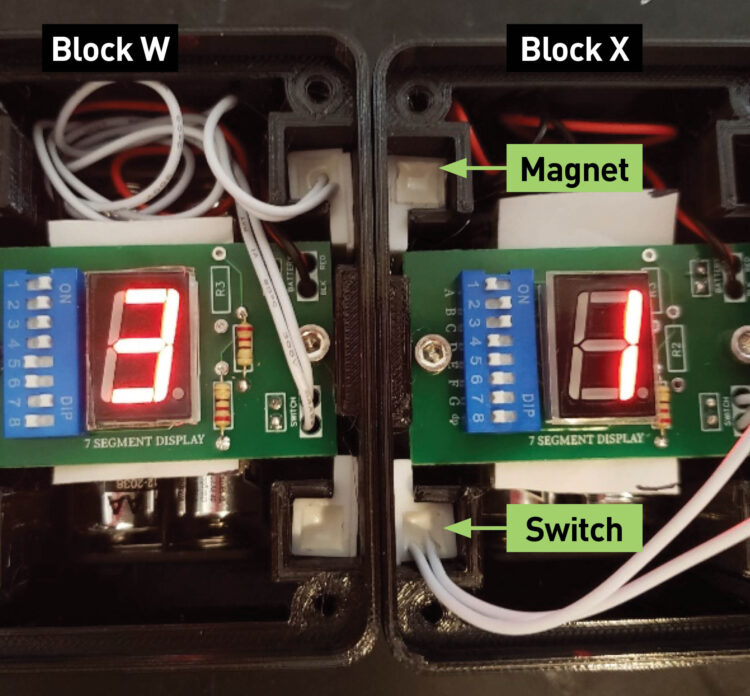
3. Block X — Slide the sensing switch from block X into the position (on the left side) that’s opposite the magnet in block W. Also slide a magnet into block X, opposite the sensing switch in block W. Both blocks should now have their numbers illuminate when next to each other.

Set block W aside (no sense wasting your batteries). Add a second magnet to block X, in either position on the right side. Tuck in the switch wires in the top or bottom of the block.
4. Block Y — Slide the block Y sensing switch into the slot opposite the magnet in block X. Block Y will now illuminate when next to block X. Set block X aside.
Slide a magnet into the right side of block Y, in either position. Tuck in the switch wires.
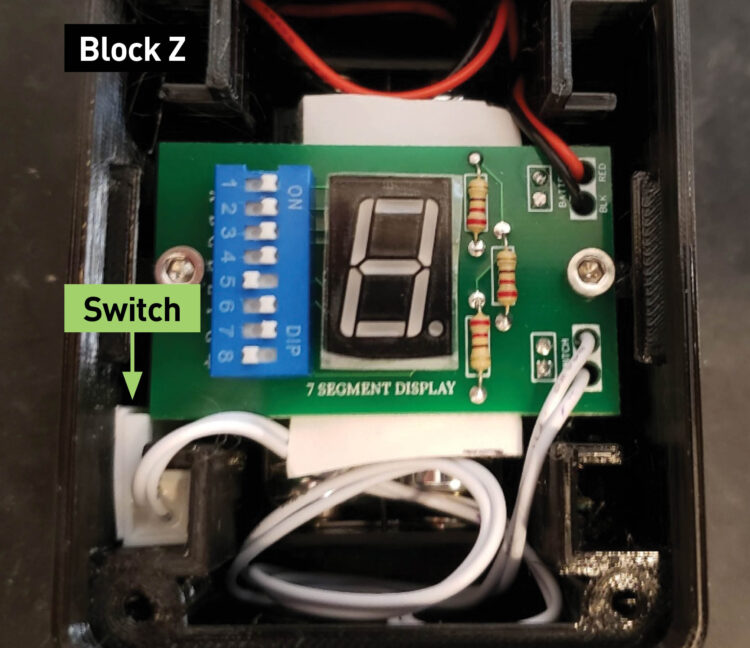
5. Block Z — Slide the sensing switch from block Z into the position opposite the magnet in block Y. Block Z will illuminate its number when next to block Y. Move block Y away to extinguish the digit. Tuck in the switch wires.


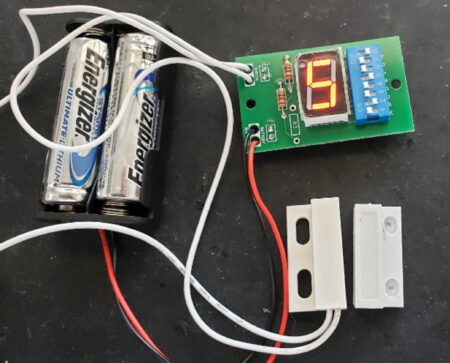
6. Confirm that when all four blocks are next to each other, in the correct order, they will all illuminate!


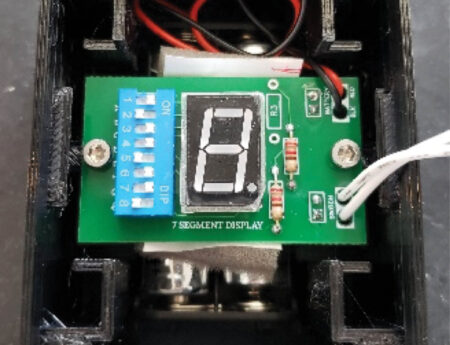
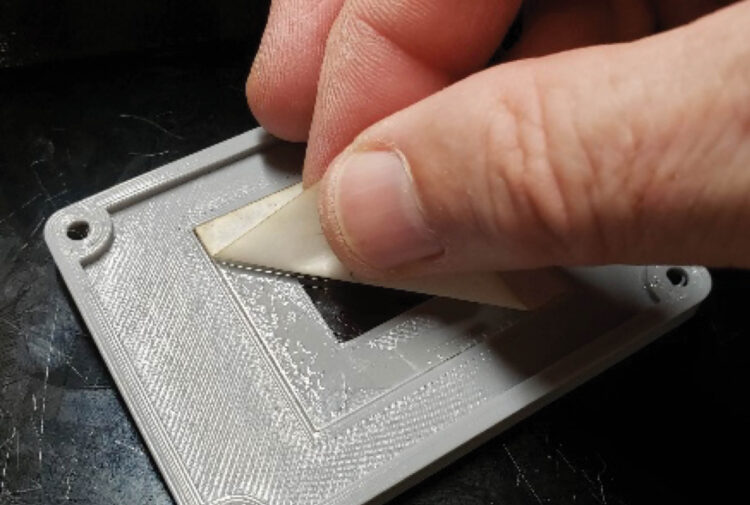
Remove the protective film over the 7-segment displays (if present) and make sure the wires are tucked in so they won’t block the view.
7. Remove the protective paper from the acrylic lens window inside of all four custom block covers.


Place the cover on all blocks, logo side down, making sure no wires are pinched under them, and attach each with four T9 Torx screws on each block.


The build is complete!